
BRE 365 Percolation Test: Homeowner Guide 2026
Table of Contents
- What Is a BRE 365 Percolation Test and Why It Matters
- Equipment and Prerequisites for a Soakaway Percolation Test
- Step-by-Step: Excavating Trial Pits and Filling with Water
- Monitoring Water Levels and Recording Time Intervals
- Soil Infiltration Rate Calculation for Soakaway Design
- Soakaway Design Requirements and Minimum Distance from Soakaway to Building
- Troubleshooting Failed Tests and Seasonal Considerations
- Frequently Asked Questions
Last Updated: September 13, 2026
What Is a BRE 365 Percolation Test and Why It Matters
A BRE 365 percolation test is a controlled field measurement of how quickly water drains through soil, used to decide whether a soakaway will work on your site and how large it needs to be. For homeowners, it is often the single piece of evidence that decides whether a planning application can demonstrate adequate surface water run-off arrangements.
This guide from The Drainage Designers covers the full process: excavation, filling, monitoring, and the soil infiltration rate calculation that follows. The BRE 365 method is the established procedure referenced in Building Regulations Approved Document H, drainage and waste disposal and in CIRIA’s SuDS guidance for sustainable drainage, which is why local authorities and lead local flood authorities expect to see it.
Here is the part most guides skip: the test is not just a hole and a hose. How you dig it, fill it, and record the water level at each interval determines whether the result is defensible. Get those wrong and you will be repeating the work in worse weather.
Equipment and Prerequisites for a Soakaway Percolation Test
You need a small, unglamorous kit. Nothing here is specialist, but each item affects whether your readings hold up.
Tools You Will Need
- Spade, mattock, and a narrow trenching tool for a clean excavation
- Tape measure and a marked rod for consistent depth readings
- A bucket or two, plus a hose or water carrier for the fill and drain cycles
- A stopwatch or phone timer for accurate time intervals
- A notebook and a camera for the visual documentation requirements
- Wellington boots and gloves, because you will be standing in wet ground
Safety and Site Preparation
Check for buried services before you break ground. Cable avoidance plans and a careful scan take minutes and prevent a serious incident. Mark out your trial pit away from the building, boundaries, and any trees, then clear vegetation and loose topsoil.
Digging without checking for buried services is the most common and most dangerous mistake on this job. A strike on a gas or electricity line can be fatal, and the cost of repair sits with you.
Step-by-Step: Excavating Trial Pits and Filling with Water
Follow the sequence below in order. Skipping a step usually means the test has to be redone.
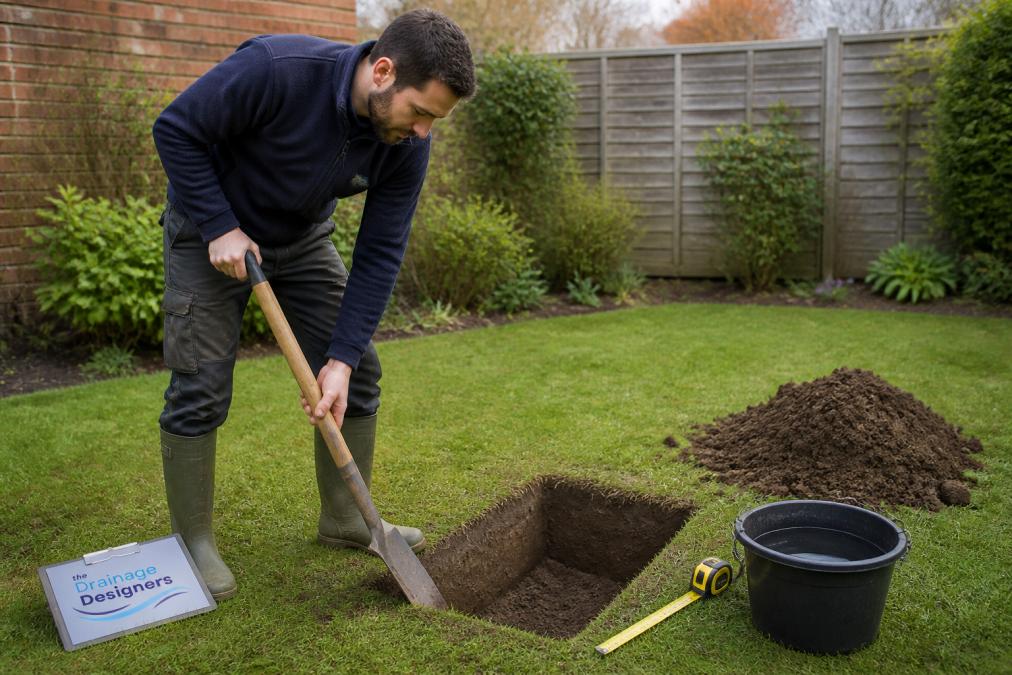
- Excavate the trial pit to the dimensions set out below, keeping the sides as vertical and clean as you can.
- Record the depth and the ground conditions you encounter at each level.
- Fill the pit with water and leave it to soak away completely. This saturates the soil and gives a truer drainage rate.
- Refill the pit and begin your timed monitoring.
Trial Pit Dimensions and Depth
A trial pit for a soakaway test is typically 300mm square and 300mm deep below the proposed invert level of the soakaway. The base must sit at the depth where the soakaway will actually discharge, not at ground level. If the pit is too shallow, you are testing the wrong soil.
Fill and Drain Cycles
The first fill is a soakaway pre-soak, not a measurement. Let it drain fully. The second fill is the one you time, and you continue until the water drops consistently between readings. Two or three cycles are common on slower ground.
Monitoring Water Levels and Recording Time Intervals
Water level monitoring decides the quality of your result. Record the fall at fixed intervals, typically every 30 minutes, and keep going until you have enough readings to see a steady drainage rate. Stop early and you have a guess, not a measurement.
Water level must be read against a fixed datum, not the pit base, because the base can soften or silt up during the test. Drive a stout peg beside the pit, or lay a straight timber across the top, and mark a reference point on it. Measure from that reference down to the water surface at every reading. Measuring from the base each time lets small collapses or sediment build-up corrupt your data.
A common pattern is readings every 30 minutes for the first two hours, then hourly until the fall between consecutive readings becomes roughly constant. Three to five consistent readings are usually enough to demonstrate a steady rate. If the water is still dropping faster at the end than at the start, you have not reached steady state and should continue.
Log each reading with the time, the depth of water remaining, and a note on weather and ground conditions. Take photographs at each interval with something for scale in frame. This visual documentation supports your submission and answers questions before they are asked.
Visual Documentation Checklist for Building Control
Building Control inspectors and lead local flood authority reviewers look for evidence that the test was run properly, not just a final number. A submission that includes the following is far less likely to be queried:
- A photograph of the empty pit before filling, with a tape measure or rod showing the depth and the pit dimensions
- A photograph of the pit during the pre-soak fill, showing the water level against your fixed datum
- A photograph at each timed reading, taken from the same position and angle, with the water level visible against the datum
- A written log sheet showing the date, start time, weather conditions, and the water level at each interval
- A note of the ground conditions encountered during excavation, including any changes in soil type with depth
- A site plan or sketch showing the pit location relative to the proposed soakaway, the building, and the boundary
Photograph the pit from the same position and angle at every reading. A consistent set of images is far easier for a reviewer to follow than a scattered batch taken from different spots. Include a visible clock or timestamp in at least one image per session.
If you are submitting the results yourself, keep a duplicate set of all photographs and log sheets. Building Control may ask for them again, and reconstructing a test from memory is not possible.
Soil Infiltration Rate Calculation for Soakaway Design
The soil infiltration rate calculation converts your recorded water level drops into a single figure for the soil. That figure, often expressed as the percolation coefficient, tells you how much water the ground can accept per square metre over time.
The principle is straightforward: take the fall between consecutive readings, divide by the time interval, and account for the wetted surface area of the pit. Use the slowest consistent rate rather than the fastest, because soakaway capacity must be designed for the worst realistic ground conditions, not the best.
A worked example makes this clearer. Suppose your pit is 300mm square and 300mm deep, and after the pre-soak you record the following during the timed phase:
| Time from start | Water level below datum | Fall since last reading |
|---|---|---|
| 0 minutes | 100mm | – |
| 30 minutes | 160mm | 60mm |
| 60 minutes | 215mm | 55mm |
| 90 minutes | 265mm | 50mm |
| 120 minutes | 310mm | 45mm |
The fall is slowing, which is normal as the soil approaches saturation. The slowest consistent fall here is 45mm over 30 minutes, or 1.5mm per minute. To convert that to an infiltration rate, divide the volume of water lost per unit time by the wetted surface area of the pit. For a pit 300mm square with water standing to roughly 200mm, the wetted area is the base (0.09 square metres) plus the four sides (4 x 0.3m x 0.2m = 0.24 square metres), about 0.33 square metres. The volume lost in 30 minutes at 45mm fall is 0.3m x 0.3m x 0.045m = 0.00405 cubic metres. Dividing by 30 minutes and then by the wetted area gives a rate in metres per minute, converted to metres per second or per hour depending on your design method.
This is where many homeowners reach the limit of what they can reasonably do themselves. The arithmetic is not difficult, but the assumptions about wetted area, the choice of readings, and the conversion to a design infiltration rate all affect the final soakaway size. Get the rate too high and the soakaway will be undersized and flood. Get it too low and you will build a larger, more expensive soakaway than necessary.
DIY Versus Professional Certification
You can legally carry out the excavation, filling, and monitoring yourself. Nothing in the building regulations prevents a homeowner from digging a trial pit and recording water levels. The question is what happens next.
Building Control and lead local flood authorities generally require the infiltration rate and soakaway design to be submitted by a competent person. Your own test data can be used, but the calculation and design statement often need to be prepared or checked by someone with relevant expertise, such as a drainage engineer or suitably qualified surveyor. Some local authorities will accept a homeowner-prepared calculation if it is clear, well-documented, and consistent with the BRE 365 method, but this varies.
A common pattern is for homeowners to run the test themselves, then engage a professional to review the data, perform the calculation, and produce the design. This keeps costs down while ensuring the submission is robust. If you are in any doubt whether your local authority will accept a self-certified result, ask them before you start digging. A short email to Building Control confirming what they expect will save time later.
Ground conditions matter here. A high water table, compacted ground, or heavy clay will pull the infiltration rate down, and that drives the size of the drainage field you need. A slower rate means a larger infiltration surface area and more land take. If your calculated rate is very low, infiltration may not be viable at all and you need an alternative drainage strategy.
Soakaway Design Requirements and Minimum Distance from Soakaway to Building
Soakaway design requirements are set by the building regulations and your local authority’s drainage strategy expectations. The minimum distance from soakaway to building is generally 5 metres, but this can increase depending on ground conditions, foundations, and site constraints (gov.uk). Always confirm the figure that applies to your site before you design.
Key requirements to work to:
| Requirement | Typical figure | Why it matters |
|---|---|---|
| Distance from building | 5 metres | Protects foundations from saturation |
| Distance from boundary | 1 to 2 metres | Avoids nuisance to neighbours |
| Depth to water table | At least 1 metre below pit base | Prevents groundwater contamination |
| Distance from trees | Varies with species | Roots can damage the structure |
Where ground is unsuitable for infiltration, you may need an alternative drainage strategy such as a connection to a surface water sewer, subject to approval.
Troubleshooting Failed Tests and Seasonal Considerations
A failed test is not the end of the project. It usually means the ground is unsuitable at that location or the test was run badly, and both have fixes.
Common causes of failure:
- Testing in the wrong season, when the water table is unusually high
- Testing compacted or disturbed ground rather than undisturbed soil
- Stopping the monitoring before a steady rate emerges
- Poor excavation that leaves smeared sides and a sealed base
Seasonal timing changes results more than most homeowners expect. Winter testing often reflects a high water table, while a dry summer can flatter a marginal site. Where a result is borderline, a second test in different conditions gives a far stronger case.
If your test fails, the answer is usually to move the soakaway, adjust its size, or change the drainage strategy entirely. It is rarely a reason to abandon the project.
A failed percolation test or a rejected drainage strategy can stall a project for months, and the cost of getting it wrong sits squarely with you. At The Drainage Designers, we handle site visits, flood risk assessments, and the full soakaway design process, including compliance with local authority and lead local flood authority requirements, designed to help your submission stand up first time. Our nationwide team works with homeowners, architects, and developers on both domestic and commercial projects. Get in touch to discuss your site and get a compliant drainage design moving.
Frequently Asked Questions
Can a homeowner legally perform their own BRE 365 percolation test?
Yes, a homeowner can legally carry out a BRE 365 percolation test themselves. Building Regulations do not require a certified contractor for the test itself. However, the results must be reliable and defensible for planning approval. If you are unsure about excavation depth, water table conditions, or calculations, hiring a professional ensures compliance and avoids costly re-tests. Always check with your local authority whether they accept DIY test reports.
How many times must a percolation test be repeated under BRE 365?
BRE 365 typically involves multiple test runs. Each run involves filling the trial pit, allowing it to drain, then refilling. Water level drops are recorded to calculate the soil infiltration rate. If results vary widely, the test may need repeating on another day or with additional pits.
What is considered a successful soil infiltration rate for a soakaway?
A successful infiltration rate for a soakaway varies depending on site-specific conditions and regulatory requirements. Very fast rates may indicate the water is discharging too quickly, potentially causing pollution. Very slow rates mean the ground may be unsuitable for a soakaway, and you will need an alternative drainage strategy such as a drainage field or attenuation tank.
What are the common mistakes to avoid when testing soil drainage?
Common mistakes include digging trial pits too shallow or too narrow, failing to pre-soak the pit before testing, not recording water levels at consistent time intervals, and testing during unusually wet or dry weather. Also avoid testing near trees or existing drainage. Following BRE 365 methodology exactly is crucial. Incorrect tests can lead to rejected planning applications and wasted time.