
Benefits of Permeable Paving for Managing Roof Runoff
Table of Contents
- How Permeable Paving Manages Roof Runoff
- The Benefits of Permeable Paving for Roof Water
- Sustainable Drainage Systems for Homes
- Driveway Drainage Solutions That Connect to Roof Runoff
- Permeable Paving Maintenance for Long-Term Performance
- Sizing, Soil Testing and Installation Essentials
- Frequently Asked Questions
Last Updated: October 11, 2026
How Permeable Paving Manages Roof Runoff
Permeable paving is a surfacing system that lets rainwater pass through gaps between blocks into a stone sub-base below, where it soaks slowly into the ground. For anyone weighing up the benefits of permeable paving for managing roof runoff, the appeal is simple: instead of firing roof water straight into the street drain, you give it somewhere to go on your own plot. At The Drainage Designers, we design these systems for homeowners, architects and developers, and the principle holds up in practice.
Here is what actually happens when roof water meets a permeable surface.
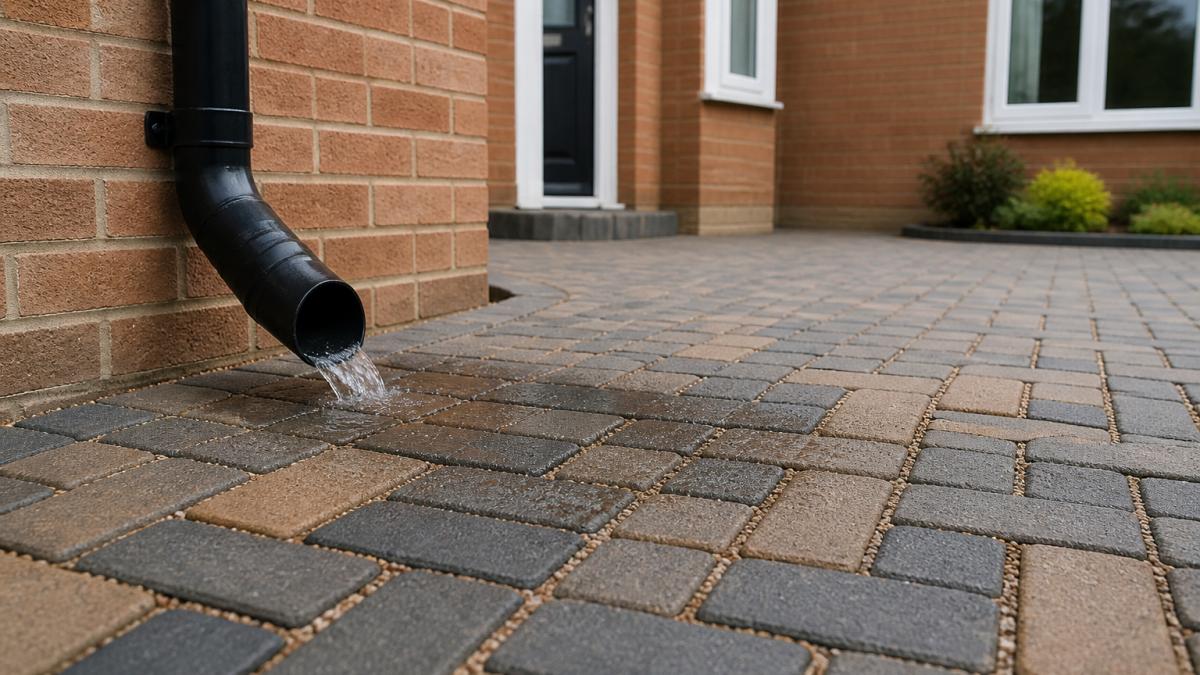
What Happens When Roof Water Meets Permeable Paving
A downspout delivers water in a concentrated burst, not a gentle spread. That matters.
A permeable surface handles it in three stages:
- Capture: water lands on the paving and flows into the joints between blocks
- Storage: the aggregate reservoir beneath holds it temporarily
- Infiltration: it seeps into the soil at a controlled rate
The key detail most guides skip is that a downspout should never discharge directly onto the paving without a spreader or channel. Concentrated flow scours the joints and washes out the bedding. Route it through a gully or a short length of channel first, then let the surface take over.
The Benefits of Permeable Paving for Roof Water
The benefits fall into two groups: what happens to the water, and what happens to the quality of it.
Reducing Surface Runoff and Flood Risk
Roof water is the fastest, cleanest runoff a property produces. Left alone, it hits the drainage system within minutes of a downpour.
Permeable paving slows that down. Water moves through the joints, sits in the sub-base, and enters the ground over hours rather than seconds. The result is a lower peak discharge leaving your plot and less pressure on the public sewer. On a street where several driveways do the same, the combined effect on local flood risk is real.
For extensions and new builds, this is often the difference between a drainage strategy that works and one that comes back with conditions.
Filtering Pollutants and Improving Water Quality
As water passes through the joints and the aggregate layers, sediment settles out and some pollutants bind to the stone. That means cleaner water reaching the ground and, eventually, the water table.
It is not a treatment plant. But for roof runoff, which carries relatively little contamination, the filtration is more than adequate. Keep grit and leaf litter off the surface and the layers keep working.
Fit a leaf guard or debris trap on the downspout before it connects to the paving. Clearing one small trap twice a year is far easier than rodding a blocked sub-base.
Sustainable Drainage Systems for Homes
Sustainable drainage systems for homes work by copying natural drainage: slow the water, spread it out, let it soak away. Permeable paving is one of the simplest components to add, because it does a job you already need a driveway to do. But for roof runoff, the design must include safe overflow and setbacks to protect your property.
Overflow Routes and Extreme Rainfall
Even a well-designed system can be overwhelmed. In very heavy rainfall, or on clay soils, the ground cannot take water fast enough. A controlled overflow to a soakaway or an approved outfall stops the system backing up against the house. The overflow should be set at a level slightly above the normal operating water level in the sub-base, so it only activates when the reservoir is full. A common approach is a pipe from the sub-base to a soakaway or to a surface water sewer if permitted. Never connect the overflow to a foul sewer.
Setbacks and Building Protection
Water must be kept away from the building. The permeable paving should fall away from the house at a gradient of at least 1 in 100. The sub-base should not be within 1 metre of the foundation unless a waterproof membrane is used to protect it. If you have a basement, keep the system at least 2 metres away, or use a lined system with a pumped outfall. Also consider neighbouring properties: do not direct overflow onto their land without permission.
Designing for Site Conditions
A typical domestic setup combines:
- Permeable paving over an aggregate sub-base
- A connection from the downspout into the paving or an adjacent soakaway
- An overflow route for extreme rainfall
On clay soils, you may need a larger sub-base or a lined system with a controlled outfall. On sloping sites, consider a series of check dams or a stepped sub-base to slow the water. If the ground is contaminated, a lined system prevents pollutants from entering the soil.
We design these schemes to satisfy Local Authority and Lead Local Flood Authority requirements, because that is usually where domestic applications succeed or stall. Our team can assess your site, test the soil, and produce a design that manages roof runoff safely and complies with the relevant standards.
Driveway Drainage Solutions That Connect to Roof Runoff
Driveway drainage solutions that connect to roof runoff need one thing above all: a clear path for the water, with a safe overflow.
The common mistake is treating the driveway and the roof as separate problems. They are not. The roof is the biggest single source of water on most plots, and if you ignore it, your new driveway is only handling half the job.
A practical layout looks like this:
- Downspout discharges into a channel or gully at the edge of the paving
- Channel feeds the permeable surface, which spreads flow across the joints
- Sub-base stores and infiltrates the water
- Overflow pipe runs to a soakaway or approved outfall
Keep the paving level or falling gently away from the building. Never let water pond against the wall.
Do not connect a downspout straight into the sub-base without a silt trap. Sediment will clog the aggregate reservoir within a few seasons, and the fix means lifting the paving.
Permeable Paving Maintenance for Long-Term Performance
Permeable paving maintenance is light, but it is not nothing. The joints are the working part of the system, and if they clog, the whole thing stops draining.
A simple routine keeps it running:
- Sweep the surface monthly to clear leaves and grit
- Clear the downspout trap and any channel twice a year
- Check for ponding after heavy rain and note where it sits
- Brush or vacuum the joints annually to lift compacted debris
- Inspect the overflow outlet each autumn
Most problems show up as standing water in one spot. Catch it early and it is a ten-minute fix. Leave it and you are looking at lifting blocks.
Sizing, Soil Testing and Installation Essentials
Sizing and soil testing decide whether the system works at all. Get these wrong and no amount of good paving will save it. This is where most guides stop short, so here is the practical detail you need.
Calculating Roof Catchment and Runoff Volume
Start with the roof area that will drain to the permeable surface. Measure the footprint of the roof in square metres, including any overhangs. For a typical semi-detached house, this might be 50 to 70 square metres. If the roof is pitched, the actual surface area is larger, but the footprint is what matters for runoff volume because rain falls vertically.
Next, estimate the volume of water that roof will produce in a design storm. A common approach is to use a rainfall intensity figure for your area, often taken from local authority guidance or the Met Office. For example, a 1 in 100 year storm might deliver 50 mm of rain in an hour. Multiply the roof area by that depth: 60 square metres x 0.05 metres = 3 cubic metres of water.
Permeable paving does not need to store all of that if the ground can infiltrate quickly. The sub-base acts as a temporary reservoir. A typical aggregate sub-base with 30% void space can hold roughly 0.3 cubic metres of water per cubic metre of stone. So to store 3 cubic metres, you would need about 10 cubic metres of sub-base, which for a driveway of 30 square metres means a depth of around 330 mm.
Soil Infiltration Testing
You cannot assume the ground will take water. A simple infiltration test involves digging a trial pit to the depth of the proposed sub-base, filling it with water, and measuring how quickly the water level drops. Do this at least three times to get a consistent rate. If the soil is clay, the rate may be less than 1 mm per hour, which is effectively impermeable. In that case, you need a lined system with a controlled outfall, not a soakaway.
The test should be done in dry conditions, not after heavy rain, to avoid misleading results. Also check the depth to the water table and any bedrock. If the water table is within a metre of the base of the sub-base, infiltration may be restricted or pose a pollution risk.
Installation Layers and Their Roles
Installation follows a set order, and each layer has a specific job:
- Excavation: Dig to the required depth, typically 300 to 500 mm below the finished surface level, depending on storage needs. Keep the base level and compacted.
- Geotextile membrane: Lay a permeable geotextile across the base and up the sides. This stops fine soil particles from migrating into the aggregate reservoir, which would clog it over time.
- Aggregate sub-base: Place and compact a clean, open-graded aggregate, such as 20 mm to 40 mm crushed stone. This is the storage reservoir. Compact in layers of no more than 150 mm to achieve proper density.
- Bedding layer: Use a thin layer of 6 mm to 10 mm aggregate or coarse sand, typically 30 to 50 mm thick, to level the blocks. Too thick and the blocks will settle unevenly.
- Paving: Lay the blocks with joints of 10 to 15 mm, filled with small aggregate or grit. The joints are the entry point for water.
Skip the geotextile and fines will migrate into the reservoir, reducing its capacity within a few seasons. Poor compaction of the sub-base leads to settlement and ponding.
| Stage | What It Does | Watch Out For |
|---|---|---|
| Soil test | Confirms infiltration rate | Testing in dry conditions only |
| Excavation | Creates reservoir depth | Damage to nearby roots |
| Geotextile | Stops fines entering | Tears during backfill |
| Sub-base | Stores and infiltrates | Poor compaction |
| Bedding | Levels the blocks | Too thick, blocks settle |
| Paving | The wearing surface | Joints too narrow |
If you would rather not manage that sequence yourself, this is exactly the work we handle. Our team covers site visits, flood risk assessments and council approvals from start to finish.
Frequently Asked Questions
Can roof water be directed onto permeable paving?
Yes, roof water can be directed onto permeable paving provided the system is designed to handle the additional volume. A downspout can discharge onto the paving surface or into a below-ground aggregate reservoir. The paving, sub-base and soil infiltration rate must be sized to cope with the combined rainfall from both the roof and the driveway. A drainage design professional can confirm whether your site’s soil and layout can accommodate the extra flow.
Does permeable paving need regular maintenance?
Permeable paving maintenance is straightforward but essential. Sweep the surface regularly to remove leaves, sediment and debris that can clog the joints. If you notice water pooling, the joints may need re-sanding or the sub-base may require inspection. Well-maintained permeable paving can perform effectively for decades, but neglect leads to reduced infiltration and surface waterlogging.
What are the disadvantages of permeable paving?
Permeable paving may not suit every site. Clay soils with low infiltration rates can limit how much water the system handles, potentially requiring an overflow connection to a drain. Regular maintenance is needed to prevent clogging. The initial installation cost can be higher than conventional paving. Some homeowners also find the textured surface less smooth underfoot. A site assessment can determine whether permeable paving is the right fit for your property.
How do I know if my block paving is permeable?
Check the joints between the blocks. Permeable block paving has wider gaps filled with grit or gravel that allow water to drain through. If the joints are tight and filled with mortar or kiln-dried sand, the paving is likely impermeable. You can also pour a glass of water onto the surface. If it disappears within a few seconds, the paving is permeable. If it pools, the system is either impermeable or clogged and needs maintenance.