How to Clear Planning Drainage Conditions: Step-by-Step
Understanding Planning Drainage Conditions
Learning how to clear planning drainage conditions is essential for anyone managing a development project in the UK. At The Drainage Designers, we’ve guided hundreds of homeowners, architects, and developers through this process. Planning drainage conditions are specific requirements imposed by your local council or Lead Local Flood Authority to ensure your development manages surface water appropriately and doesn’t increase flood risk downstream.
These conditions typically appear on your planning permission document and must be discharged before you can commence certain works on site. The challenge most developers face is gathering the right evidence and documentation to prove compliance. Without a clear strategy, what should take weeks can stretch into months of back-and-forth with planning officers.
Pro Tip
Planning drainage conditions are not optional extras, they’re legal requirements tied to your planning permission. Failing to clear them before starting work can result in enforcement action and project delays that cost far more than getting it right the first time.
What You’ll Need Before You Start
Before beginning the process of clearing drainage conditions, gather specific documentation and establish your team. Your local council will expect evidence demonstrating that your proposed drainage system meets the requirements stated in your planning permission. This typically includes detailed drainage plans, calculations showing how surface water will be managed, and confirmation that your design complies with current guidance.
You’ll need a qualified drainage engineer or surveyor who understands UK drainage standards and your local authority’s specific expectations. Request design guidance documents from your planning department at the outset, as they save considerable time and prevent rejection cycles. You should also identify your Lead Local Flood Authority, which may differ from your planning authority depending on your location.
Documentation checklist:
- Detailed site survey and ground conditions report
- Topographical survey showing levels and drainage flow paths
- Proposed drainage layout plan with dimensions and specifications
- Surface water management calculations and justification
- Maintenance and management plan for any sustainable drainage systems
- Evidence of consultation with water authority if applicable
- Structural drawings showing how drainage integrates with buildings
Contact your local council’s drainage or planning department and ask explicitly what evidence they need to discharge each condition. Different authorities have different standards.
Step 1: Understand Your Discharge Planning Conditions
Start by reading your planning permission document carefully and identifying every drainage-related condition. Write them out in full rather than paraphrasing, as small misunderstandings at this stage create problems later.
Planning conditions typically fall into several categories. Some require you to submit detailed drainage designs for approval before work starts. Others ask you to implement specific drainage features like permeable paving or attenuation tanks. Some conditions require you to demonstrate consultation with the water authority. A few require ongoing maintenance plans showing how drainage systems will be looked after once the development is complete.
Read each condition and ask yourself three questions: What exactly is being required? What evidence will prove I’ve met this requirement? Who at the council needs to approve this evidence? The Drainage Designers (Woodvale consulting Ltd) always starts here, because a clear understanding of what’s needed prevents wasted effort.
Watch Out
Misinterpreting a single word in a planning condition can lead to rejected submissions. “Shall be” means mandatory. “Should” may offer flexibility. “In accordance with” requires you to follow a specific standard. Read conditions with precision.
Step 2: Develop a Drainage Strategy for Planning Permission
Your drainage strategy is the backbone of clearing planning conditions. This is a comprehensive explanation of how surface water will be managed across your entire site, from the moment rain falls until it leaves your property or is stored safely.
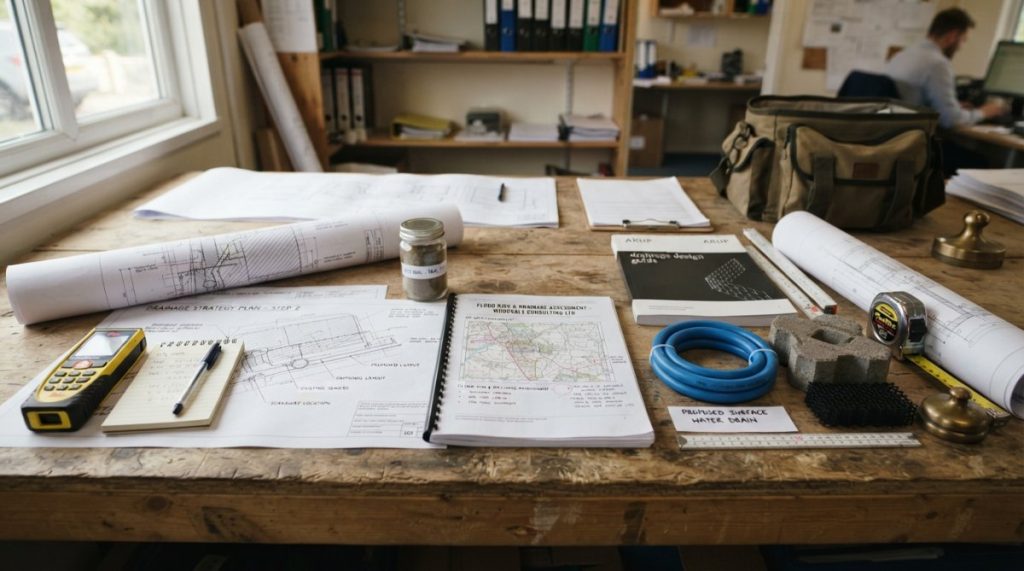
Start with a site survey that identifies existing drainage infrastructure, ground levels, soil permeability, and nearby watercourses or flood risk areas. Your engineer will use this information to determine where water naturally flows and where it pools. Understanding what’s already there prevents expensive mistakes later.
Your strategy should show how you’ll manage surface water from different areas of the site. Roof water, patio water, and parking areas often require different approaches. Some water might discharge to the mains sewer, some to a watercourse, and some might be retained on-site through storage or infiltration. The strategy explains the reasoning behind each choice and demonstrates compliance with current best practice.
Document the design rainfall that your system is designed to handle. UK standards typically require systems to manage surface water from a 1 in 100 year rainfall event plus an allowance for climate change. Your engineer will calculate how much water your site generates during this event and confirm that your proposed system can handle it without flooding.
Step 3: Incorporate SUDS Planning Requirements into Your Design
SUDS, or Sustainable Drainage Systems, are now a requirement in most UK planning permissions. These drainage methods mimic natural drainage processes and provide benefits beyond just moving water away. Your planning conditions almost certainly require SUDS compliance, so understanding this requirement is crucial.
SUDS planning requirements emphasise a hierarchy of drainage approaches. The first preference is always infiltration, allowing water to soak into the ground naturally. If ground conditions don’t permit infiltration, the next option is attenuation, storing water temporarily until it can be discharged slowly. Only when infiltration and attenuation aren’t feasible should you consider direct discharge to a watercourse or sewer.
Common SUDS features include permeable paving, rain gardens, swales, detention basins, and green roofs. Each has different maintenance requirements and suitability depending on your site. Your engineer will recommend a combination that suits your specific circumstances.
The SUDS planning requirements document from your local council outlines which features they prefer and which they’ll accept. Reviewing this guidance before you design prevents the common mistake of proposing a system that doesn’t align with local expectations. Your design should explain why you’ve chosen each element and how it meets the SUDS hierarchy.
Key Takeaway
SUDS aren’t just about compliance, they provide real benefits including reduced flooding, improved water quality, and enhanced site aesthetics. Councils increasingly view SUDS as a core part of good development design, not a tick-box requirement.
Step 4: Prepare and Submit Pre-Commencement Drainage Conditions
Pre-commencement drainage conditions must be discharged before you can start any work on site. Submitting a pre-commencement drainage condition requires careful preparation and attention to detail.
Compile all your documentation into a single submission. This typically includes your detailed drainage design drawings, calculations showing surface water management, a maintenance plan, and a covering letter explaining how you’ve met each requirement stated in the planning condition. Many councils now require submissions through their online planning portal.
Your covering letter is crucial. It should reference the specific planning condition number, quote the exact wording of the requirement, and then explain point by point how your submission meets it. This approach makes it easy for the planning officer to verify compliance.
Include a site location plan showing where drainage features will be located, detailed design drawings with dimensions and materials, soil test results if proposing infiltration, and evidence of consultation with the Environment Agency or water authority if applicable. Allow at least two weeks for the planning authority to review your submission. If you don’t hear within the council’s stated timescale, contact the planning officer to confirm receipt and ask when you can expect a response.
Step 5: Liaise with Your Local Council and Lead Local Flood Authority
Effective communication with your local council and Lead Local Flood Authority significantly speeds up the process of clearing drainage conditions. These organisations have specific requirements and preferences that understanding early prevents rejection cycles.
Your Lead Local Flood Authority is responsible for managing flood risk from surface water, groundwater, and ordinary watercourses in your area. Contact them early in your design process and ask what they expect to see in your drainage strategy. Many LLFAs have published guidance documents that spell out their specific requirements.
The planning officer assigned to your application is your primary contact for pre-commencement conditions. Email them your submission and ask for confirmation of receipt. Offer to discuss any aspects of your proposal if they’d find that helpful. A brief conversation often clarifies misunderstandings that might otherwise lead to a rejection letter.
If your site is near a watercourse, the Environment Agency may also need to be consulted. Contact them early and provide them with your proposals. Document all correspondence with planning officers, the LLFA, and other statutory consultees. This documentation proves that you’ve followed the required consultation process.
Common Mistakes to Avoid When Clearing Drainage Conditions
Understanding common pitfalls helps you navigate the process more efficiently.
The first mistake is submitting incomplete information. Planning officers can only discharge conditions when they have everything they need to verify compliance. If your submission is missing soil test results, maintenance plans, or consultation evidence, they’ll reject it and ask you to resubmit. Checklist every requirement stated in your planning condition before you submit anything.
The second mistake is misunderstanding local authority expectations. Councils vary considerably in their preferred drainage approaches. Always request the specific council guidance for your area and design accordingly.
The third mistake is underestimating timescales. Pre-commencement conditions typically take 4-8 weeks to discharge, sometimes longer if the planning authority requests additional information. Build in buffer time into your project schedule.
The fourth mistake is failing to maintain systems after approval. Many conditions require you to demonstrate that drainage systems will be properly maintained. Think through the long-term management of every drainage feature you’re proposing.
The fifth mistake is changing your design after conditions are discharged. Once a pre-commencement condition is approved, any significant changes to the drainage design typically require a new submission or even a modification to the planning permission. Get your design right before you submit.
Clearing planning drainage conditions successfully requires clear understanding of what’s required, careful preparation of comprehensive documentation, and effective communication with planning authorities. The Drainage Designers (Woodvale consulting Ltd) specialises in exactly this process, managing the technical design, council liaison, and documentation to ensure conditions are discharged efficiently. With expertise in both commercial and domestic projects across the UK, we deliver drainage designs that satisfy local authorities first time, keeping your project on schedule. Get in touch with The Drainage Designers (Woodvale consulting Ltd) to discuss your drainage conditions and how we can help you clear them with confidence.
Summary Table
| Stage | Key Deliverables | Typical Duration | Critical Success Factor |
|---|---|---|---|
| Understand Conditions | Written summary of each requirement | 1-2 days | Precise interpretation of condition wording |
| Develop Strategy | Site survey, drainage layout, calculations | 2-3 weeks | Early consultation with council on preferences |
| Incorporate SUDS | Detailed SUDS design, justification | 1-2 weeks | Alignment with local SUDS guidance |
| Prepare Submission | Complete documentation package | 1 week | Thorough checklist against condition requirements |
| Submit and Liaise | Formal submission, respond to queries | 4-8 weeks | Prompt response to planning officer requests |
| Discharge Achieved | Formal approval from planning authority | Immediate | All requirements satisfactorily demonstrated |
Supporting Research and External Resources
Understanding current UK drainage standards strengthens your approach to clearing planning conditions. The Environment Agency guidance on sustainable drainage systems provides the foundational principles that most councils now expect developments to follow. This guidance emphasises the drainage hierarchy and explains why infiltration and attenuation are preferred over direct discharge to sewers.
For SUDS-specific requirements, consult the CIRIA SUDS manual and design guidance which is widely referenced by UK planning authorities when assessing drainage proposals. This resource details specific design standards, maintenance requirements, and performance criteria for different SUDS features.
Your local authority’s own drainage and flood risk guidance is equally important. Most councils publish supplementary planning documents that outline their specific expectations for surface water management. The Planning Portal guidance on pre-commencement conditions explains the formal process for discharging conditions and what documentation planning officers typically require. Reviewing this guidance alongside your council’s local requirements ensures you submit information in the format they expect.
Frequently Asked Questions
What is a planning drainage condition in the UK?
A planning drainage condition is a requirement imposed by your local planning authority or Lead Local Flood Authority that you must satisfy before commencing development. It typically requires you to submit detailed drainage designs, flood risk assessments, or sustainable drainage system (SUDS) proposals for approval. These conditions ensure your development complies with environmental regulations and flood risk management standards. Failure to discharge the condition means you cannot legally begin construction.
How do I apply to discharge planning drainage conditions?
You apply by submitting a formal request to your local planning authority, typically using their discharge of conditions application form. Include all required documentation: detailed drainage plans, SUDS designs, flood risk assessments, maintenance schedules, and any supporting technical reports. Submit these alongside your application reference number. The council will review your submission and either approve it, request amendments, or reject it. Allow 8-12 weeks for their decision, though timescales vary by authority.
What documents are needed to clear drainage planning conditions?
Essential documents include: detailed drainage design drawings, site plans showing drainage routes, flood risk assessment reports, SUDS strategy documents, maintenance and management plans, calculations demonstrating compliance with local standards, and any environmental impact assessments. Your local council’s planning permission should specify exactly which documents they require. Working with a drainage design specialist ensures you submit complete, compliant documentation that meets your specific local authority’s requirements first time.
How long does it take to clear drainage planning conditions?
The timeline varies significantly depending on your local council’s workload and documentation completeness. Initial submission to decision typically takes 8-12 weeks, though some authorities process faster. If the council requests amendments, add another 4-8 weeks. Pre-commencement conditions must be cleared before you can start construction. Planning ahead and submitting thorough, well-prepared documentation from the outset minimises delays and reduces the likelihood of rejection or requests for revisions.