
Drainage Design for House Extensions: A 2026 Guide
Table of Contents
- Why Drainage Design Matters for Your Extension
- Understanding Building Regulations Part H Drainage
- Step 1: Map Your Existing Drainage and Sewer Lines
- Step 2: Decide on Foul Water and Surface Water Strategies
- Step 3: Navigating the Build Over Agreement Process
- Step 4: Meeting Soakaway Design Requirements
- Step 5: Planning the Drainage Layout for the Foundation Stage
- Common Drainage Failures and How to Avoid Them
- Frequently Asked Questions
Last Updated: September 8, 2026
Getting the drainage design for house extensions wrong is one of the fastest ways to stall a project or face costly rework after the foundations are poured. It is a fixed constraint buried in the ground, and correcting a mistake later means digging up new concrete. Whether you are adding a rear kitchen or a side return, the drainage strategy must be settled before any excavation begins. This guide walks through the practical steps, from mapping existing sewers to meeting building control approval, so you can plan with confidence.
Drainage design is the process of planning how foul water from toilets and surface water from roofs are collected and carried away from a new extension. It must comply with the Building Regulations and account for existing drains, sewer proximity, and ground conditions. Below, we break the process into clear stages and show you how to prepare a compliant layout that will not come back with conditions from building control.
Why Drainage Design Matters for Your Extension
The most common reason extension plans get rejected on drainage grounds is a layout that ignores what is already underground. A new extension often sits over existing pipework, and building over a live drain without approval can compromise the structural integrity of both the pipe and your new floor slab.
A well-planned drainage strategy protects your build in three ways. It prevents foul water from backing up into the new living space, it manages rainwater runoff so it does not pool against the new walls, and it satisfies the local authority that your proposals are safe. Skipping this groundwork rarely saves time, because building control will ask for the same information later, usually when the trenches are already open.
Getting the design right at the start also protects your budget. Moving a proposed inspection chamber or revising a pipe run after the foundation stage is far more expensive than resolving it on paper. The goal is a layout that is simple, accessible for maintenance, and fully compliant before the digger arrives.
Understanding Building Regulations Part H Drainage
Part H of the Building Regulations sets the legal requirements for drainage in England and Wales. It governs how foul water and surface water must be collected, transported, and discharged, and it is the benchmark your local authority building control will use to assess your plans.
The regulations distinguish clearly between two systems. Foul water, from toilets, basins, and appliances, must discharge into a public sewer or a private treatment system. Surface water, from roofs and paved areas, should ideally be managed on site through a soakaway or permeable surfacing before any connection to a sewer is considered. Mixing the two is not permitted in new work.
Part H also specifies minimum pipe sizes, access requirements, and the need for inspection chambers at bends and changes of direction. Your design must demonstrate that every part of the system can be accessed for cleaning and rodding. The full technical detail is set out in the Building Regulations Approved Document H, which is the definitive reference your drainage designer will work to.
Step 1: Map Your Existing Drainage and Sewer Lines
Before you design anything new, you must know what is already beneath your property. Start by checking the public sewer map for your area, which shows the location of public sewers and their easements. You can request this from your local water authority, and it is an essential first step in drainage design for house extensions.
Private drains on your own land are your responsibility to locate. Lift inspection chamber covers to trace the direction of pipe runs, and note where the private drain connects to the public sewer, usually at the boundary. A CCTV drainage survey is the reliable way to confirm the condition and route of existing pipework, particularly if the property is older.
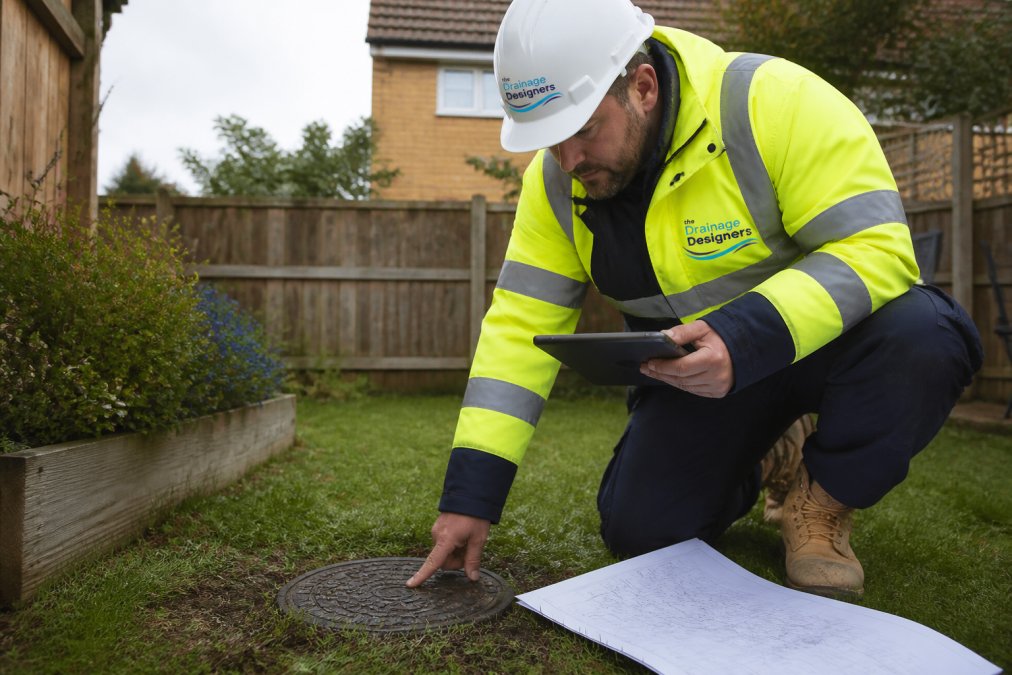
The position of existing manholes and pipe connections will dictate where your new extension can place its drainage. If a public sewer runs beneath your proposed footprint, you may need to divert it or apply for a build over agreement, which we cover in Step 3. Mapping this accurately now prevents expensive surprises when the foundations are excavated.
Locating Public Sewers and Private Drains
Public sewers are typically found in the street or garden, and they are owned by the water authority. Private drains serve a single property and become the responsibility of the water authority once they connect to the public system. Knowing which is which determines who you must seek permission from.
The sewer map will show the line of any public sewer, but it may not show the exact depth or precise route. For that, you need a site survey. A drainage engineer will trace the pipework, confirm the invert levels, and identify the nearest suitable connection point. This survey becomes the foundation of your entire drainage layout.
Step 2: Decide on Foul Water and Surface Water Strategies
Once you know what is underground, you can decide how the extension will connect. For foul water, the simplest solution is usually to connect the new soil stacks and appliances into an existing downstream inspection chamber, provided it has capacity and is at the right level.
Surface water requires more thought because the hierarchy of discharge routes is strict. Rainwater runoff should first be managed on site through infiltration, using a soakaway or permeable paving. Only if the ground cannot absorb water should you consider connecting to a surface water sewer, and a connection to a combined sewer is a last resort.
The ground conditions on your site will determine which strategy is viable. A percolation test, digging a small pit and timing how quickly water drains away, tells you whether a soakaway will work. Clay soils drain slowly and often need a larger soakaway or an alternative approach, while sandy soils absorb water readily.
Step 3: Navigating the Build Over Agreement Process
If your extension crosses over or comes within three metres of a public sewer, you cannot simply build over it. You must apply to the water authority for a build over agreement, which sets out the conditions for protecting the pipe.
The water authority will typically require the sewer to be surrounded in granular material or concrete to protect it from the weight of the new structure. They may also require access for future maintenance. The application is made to the local water authority, and the process is separate from planning permission and building regulations approval.
The key point is timing. A build over agreement must be secured before you start work, and the water authority can take several weeks to respond. Failing to apply can result in enforcement action and a requirement to dig up the new floor to expose the sewer for inspection. The water authority build over guidance explains the standard conditions and application process in detail.
Step 4: Meeting Soakaway Design Requirements
Soakaway design requirements exist to ensure that surface water infiltrates the ground safely without causing flooding or damage to nearby structures. A soakaway must be sized to hold the volume of water from a storm event and allow it to drain away within a set period.
The design starts with the percolation test results, which measure the soil’s infiltration rate. From this, a drainage designer calculates the required size of the soakaway based on the roof area draining into it and the local rainfall intensity. A common mistake is sizing the soakaway too small, which leads to surface water pooling during heavy rain.
The soakaway must also be positioned correctly. It should be at least five metres from the extension’s walls to avoid undermining the foundations, and it must not be located near trees or in areas with a high water table. The CIRIA guidance on sustainable drainage systems provides the technical methodology used to design compliant soakaways.
Step 5: Planning the Drainage Layout for the Foundation Stage
The drainage layout must be finalised before any concrete is poured, because the pipework is installed at the foundation stage. This is the point where the design on paper meets the reality of the trench. The groundworkers will dig the trenches, lay the pipes to the correct gradient, and build the inspection chambers.
The drainage strategy should show the precise route of every pipe, the location of each inspection chamber, and the connection points to the existing system. It must also demonstrate that the pipes are laid at a gradient that allows waste to flow without depositing solids. The standard minimum gradient for a 100mm pipe is 1 in 40, which means a fall of 25mm per metre.
Pipe Connections, Inspection Chambers, and Gradient
Inspection chambers are required at every change of direction, at the junction of two drains, and at the point where the extension’s drainage connects to the existing system. They provide access for cleaning and are a mandatory part of a compliant drainage layout.
Pipe connections must be made carefully to avoid damaging existing drains. The new pipe should enter the inspection chamber through a purpose-made connection, never by cutting a hole in the side of the chamber. The gradient must be consistent along the entire run, and the invert levels must align correctly at each connection.
The drainage layout should also account for the position of soil stacks within the extension. A soil stack carrying foul water from a toilet must vent through the roof, and the horizontal pipe connecting it to the inspection chamber must be laid to the correct gradient. Getting these details right on paper prevents costly adjustments during the build.
| Design Element | Minimum Requirement | Common Mistake |
|---|---|---|
| Pipe gradient (100mm) | 1 in 40 fall | Too shallow, causing blockages |
| Soakaway distance | 5 metres from building | Too close, undermining foundations |
| Inspection chamber | At every change of direction | Omitted, preventing access |
| Build over agreement | Within 3m of public sewer | Building without approval |
Common Drainage Failures and How to Avoid Them
The most frequent drainage failure in new extensions is a blocked pipe caused by an incorrect gradient. If the pipe is laid too flat, solids settle and cause an obstruction; if it is laid too steeply, the water runs away faster than the solids, leaving them stranded in the pipe.
A second common issue is connecting the new drainage to an existing inspection chamber that is already at capacity. The chamber may not have a spare connection point, or the existing pipe may not have the capacity to accept the additional flow. This is why mapping the existing system in Step 1 is so important.
Poor integration with existing landscaping is another recurring problem. A soakaway designed for the roof may be positioned where the garden will later have a patio or a shed, making it inaccessible or damaged. Think about the finished landscape when positioning drainage elements, not just the current bare ground.
Building over a public sewer without a build over agreement is a common and costly mistake. The water authority can require you to expose the sewer for inspection, which means breaking out your new concrete floor slab.
The final consideration is insurance. Many home insurance policies exclude damage caused by poor workmanship, and a drainage failure that damages your extension may not be covered. Checking the drainage design with a professional before construction is a far cheaper form of protection than relying on an insurance claim after a problem appears.
A CCTV survey of the existing drains should be done before any design work. It reveals collapsed pipes, root ingress, and incorrect connections that will otherwise surface as a blockage after your new floor is poured.
Getting the drainage design for house extensions right is about methodical planning rather than guesswork. Map what is underground, decide your foul and surface water strategies early, and secure any build over agreements before you dig. The Drainage Designers (Woodvale consulting Ltd) handles the full process, from site visits and percolation testing to securing local authority approvals, so your project stays on schedule and compliant. Approved Document H drainage guidance is the reference that underpins every compliant design.
The challenge with drainage is that the consequences of getting it wrong are buried and expensive to fix. A compliant, well-planned system protects your extension, your budget, and your timeline. At The Drainage Designers (Woodvale consulting Ltd), we simplify the process with a transparent, ethical approach and nationwide coverage, handling everything from the initial site visit to final approvals with your local authority and Lead Local Flood Authority. Get in touch and let us help maximise your planning permission success.
Frequently Asked Questions
Do I need building regulations approval for drainage on an extension?
Yes, drainage work for a house extension is notifiable under building regulations. Your local authority’s building control team will need to sign off on the design and installation of both foul water and surface water systems. This ensures compliance with Part H of the regulations, which covers the correct pipe sizes, gradients, and connections. Failing to secure approval can lead to enforcement action and complications when you sell the property.
What is a build-over agreement and when is it required?
A build-over agreement is formal consent from your local water authority when you intend to build an extension within three metres of a public sewer. It is a legal requirement, not an optional formality. You will need to apply to the water authority, providing detailed plans of your proposed foundation and drainage design. The authority will assess the risk to the sewer’s structural integrity and may impose specific conditions on your build.
What are the soakaway design requirements for a house extension?
Soakaways must be designed to comply with building regulations Part H. They need a minimum distance of 5 metres from the extension’s foundations and 2.5 metres from any boundary. The design must be based on a percolation test to confirm the ground can absorb water. A soakaway should have a minimum storage capacity calculated for a 1 in 10-year storm event, and it must discharge water below the level of the floor slab to avoid structural damage.
Can I connect my new extension drainage to the existing system?
Connecting new drainage to an existing private system is often possible, but it depends on the capacity of the current pipes. You cannot connect directly to a public sewer without a formal connection agreement. A drainage survey will confirm the depth, condition, and route of your existing drains. The key is ensuring the new connection point is made via a properly sealed inspection chamber and that the combined flow does not overload the existing system.