
7 Ways to Improve Residential Drainage Efficiency
Table of Contents
- 1. Fix Your Grading and Slope Management
- 2. Install French Drains and Sub-Surface Systems
- 3. Use Sustainable Drainage Systems (SuDS) for Homes
- 4. Choose Permeable Paving and Hardscaping
- 5. Extend Downspouts and Maintain Gutters
- 6. Understand Your Residential Flood Risk Assessment
- 7. Improve Soil Composition and Infiltration
- Conclusion
- Frequently Asked Questions
Last Updated: October 1, 2026
1. Fix Your Grading and Slope Management
Good residential drainage starts with the ground itself. Grading is the shape and slope of your garden, and it decides where rainwater actually goes. Get it wrong and every other fix on this list works harder than it should.
How to Check and Correct Your Garden Slope
Total Time: 2 to 3 hours
Difficulty: Beginner
What You’ll Need
- A long spirit level, 1.2 m or longer
- A wooden stake or straight timber batten
- A tape measure
- A notebook
- Test the slope near your walls. Place the spirit level on the ground with one end touching the wall. Lift the far end until the bubble centres, then measure the gap under it. A gap of 15 to 20 mm over 1.2 m is about right.
- Repeat the test at every corner of the house. Note each reading.
- Find the low spots. Walk the garden after heavy rain and mark anywhere water pools for more than an hour.
- Add soil where the ground falls towards the house. Build up a gentle bank using topsoil, then firm it and let it settle.
- Never raise the ground above your damp proof course. Leave at least 150 mm of clear wall below it.
Expected Result: Water runs away from the building instead of sitting against it.
Never build soil up over your damp proof course. It bridges the barrier and pushes water straight into the wall, which shows up as damp patches indoors within a season.
2. Install French Drains and Sub-Surface Systems
A French drain is a gravel-filled trench containing a perforated pipe that collects groundwater and carries it away. It handles the water you cannot see, the stuff sitting below the surface and pushing against your foundations.
Step-by-Step French Drain Installation
- Mark the route. Run the trench from the wettest point to a suitable outlet, such as a soakaway or storm connection.
- Dig the trench. Aim for 300 to 450 mm deep and about 300 mm wide, with a fall of roughly 1:100 along its length.
- Line the trench with geotextile fabric. This stops fine soil clogging the gravel.
- Add a 50 mm layer of gravel. Then lay the perforated pipe on top, holes facing down.
- Cover the pipe with more gravel. Wrap the fabric over the top to close the trench.
- Backfill with soil and turf over. Test the flow with a hose before you close it up.
Expected Result: Groundwater drains away instead of building up around your foundations.
Sizing Your Soakaway Correctly
A soakaway is a pit or crate system that allows water to infiltrate into the ground. If it is too small, it will overflow and flood; if it is too large, you waste money. The correct size depends on the soil’s percolation rate and the roof area draining to it.
How to test percolation:
- Dig a test hole 300 mm square and 300 mm deep.
- Fill it with water and let it drain completely. Repeat three times.
- On the third fill, time how long it takes for the water level to drop by 75 mm.
- If the hole drains in under 30 minutes, infiltration is good. If it takes longer than 2 hours, the ground is unsuitable for a soakaway.
Never connect a French drain to a foul sewer without permission. Surface water must go to a soakaway, a watercourse, or a surface water sewer. Discharging into a foul sewer can overload the system and is often illegal.
Maintenance for Sub-Surface Systems
French drains and soakaways are not maintenance-free. Over time, silt and roots can clog the pipe and gravel.
- Inspect the outlet annually for blockages.
- Flush the pipe with a hose every two to three years.
- Keep the soakaway clear of leaves and debris.
- Check for signs of failure: slow drainage, water pooling above the trench, or soggy ground along the route.
DIY vs Professional: When to Call an Expert
Installing a French drain is within the reach of a competent DIYer for shallow trenches in open ground. But call a professional if:
- The trench needs to be deeper than 600 mm.
- The route crosses services, driveways, or retaining walls.
- The ground is heavy clay and a soakaway may not work.
- You need to connect to a surface water sewer or watercourse, which requires permission.
3. Use Sustainable Drainage Systems (SuDS) for Homes
SuDS is the practice of managing rainwater close to where it falls, using natural processes instead of piping it straight into the sewer. For homes, that usually means slowing water down and letting the ground absorb it.
Rain Gardens and Bioswales Explained
A rain garden is a shallow planted hollow that collects runoff from roofs and drives, then lets it soak away. A bioswale is a longer, gently sloping channel planted with grasses that filters and slows water as it moves.
- Rain gardens suit small plots and look like ordinary planting
- Bioswales suit longer boundaries and larger gardens
- Both cut runoff velocity and ease pressure on the mains sewer
- Both need the right soil mix to drain well
4. Choose Permeable Paving and Hardscaping
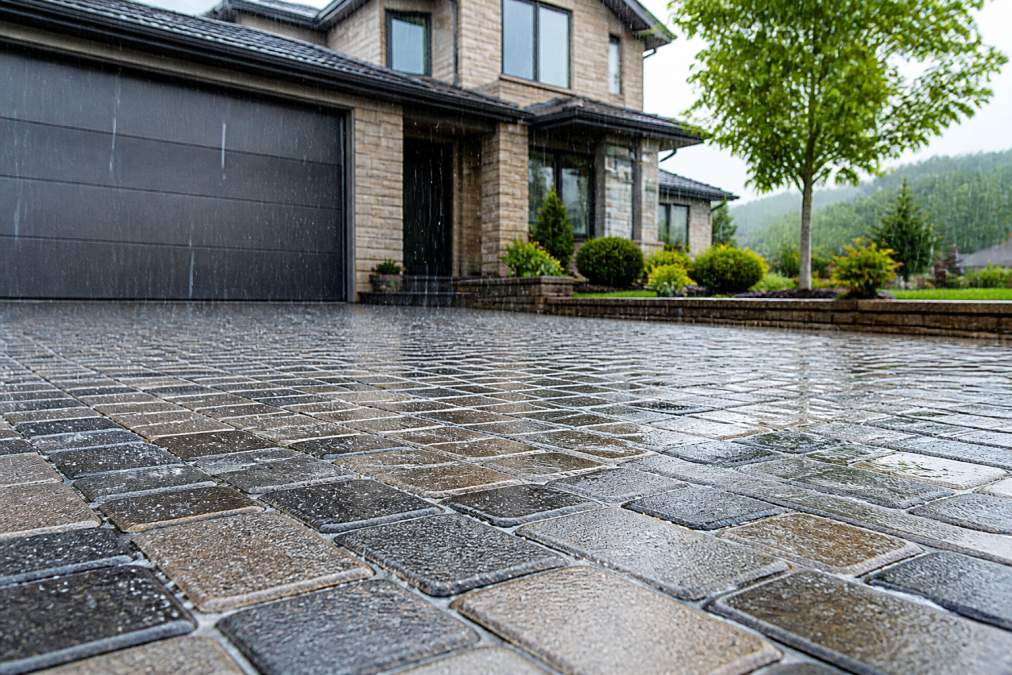
- Permeable block paving suits driveways and paths
- Resin-bound surfaces suit lighter foot traffic
- Gravel and grid systems suit parking areas
- Permeable concrete suits larger hard areas
Test infiltration before you commit to a surface. Dig a 300 mm test hole, fill it with water, and see how fast it drains. If it empties slowly, permeable paving alone will not solve your problem.
5. Extend Downspouts and Maintain Gutters
Your gutters and downspouts move a surprising amount of water. When they work, they carry roof runoff clear of the building. When they fail, they dump it right at your foundations.
Maintenance is where most homeowners slip:
- Clear gutters every autumn and after storms
- Check downspouts for blockages at the bend
- Fit leaf guards on gutters under trees
- Confirm extensions still reach clear of the wall
- Look for staining on walls that shows overflow
6. Understand Your Residential Flood Risk Assessment
A residential flood risk assessment is a report that identifies how likely your property is to flood, and from where. It looks at river, surface water, groundwater, and sewer sources, then sets out how the risk is managed.
When Is a Flood Risk Assessment Required?
You will need a flood risk assessment if:
- Your property is in a flood zone 2 or 3 (medium to high risk).
- The site is larger than 1 hectare.
- You are building a new dwelling or extending by more than 250 square metres.
- The site is in an area with critical drainage problems, as identified by the Lead Local Flood Authority.
Even if not mandatory, an assessment is wise if you have experienced flooding, if the ground is clay, or if you are installing basements.
What a Flood Risk Assessment Covers
A typical assessment includes:
- Flood sources: river, surface water, groundwater, sewers, and reservoirs.
- Flood depth and velocity: for a range of return periods (e.g., 1 in 100 years).
- Existing drainage: how the site currently manages runoff.
- Mitigation measures: such as raised floor levels, permeable paving, or attenuation tanks.
- Residual risk: what happens if defences fail.
The assessment will also consider climate change, using allowances set by the Environment Agency. For example, peak river flow may be increased by 20% to 40% depending on the epoch.
How It Affects Your Drainage Design
The flood risk assessment sets the design parameters. It might require you to:
- Limit the discharge rate from your site to greenfield runoff rates.
- Provide attenuation storage to hold back water during heavy rain.
- Use sustainable drainage systems (SuDS) to manage runoff close to source.
- Raise electrical sockets and boilers above predicted flood levels.
A flood risk assessment is not just a tick-box exercise. It is the foundation of a drainage strategy that satisfies planners and protects your home. If your project needs one, involve a specialist early.
DIY vs Professional: When to Call an Expert
You can gather basic information yourself, such as checking the Environment Agency’s flood map. But writing a flood risk assessment that satisfies the Lead Local Flood Authority is a specialist task. It requires knowledge of hydraulic modelling, planning policy, and local requirements.
Hire a professional if:
- Your site is in flood zone 2 or 3.
- The development is major (10 or more homes).
- The site has complex drainage or multiple flood sources.
- You need to demonstrate betterment or exception tests.
7. Improve Soil Composition and Infiltration
Heavy clay soil is the enemy of drainage. Water sits on top because it cannot pass through, and no amount of piping fixes saturated ground if the soil itself will not drain.
- Aerate compacted ground with a garden fork or hollow tines
- Work in organic matter to break up heavy clay
- Add grit or sand to improve structure on clay
- Avoid walking on wet beds, which re-compacts them
- Mulch borders to keep soil open and alive
Conclusion
Getting residential drainage right is mostly about diagnosing the real problem before you spend money on a fix. Surface water, groundwater, and soil all behave differently, and each needs its own solution. That is where The Drainage Designers come in. We handle site visits, flood risk assessments, and drainage design through to council approval, so your project meets Local Authority and Lead Local Flood Authority requirements and stays on schedule.
Frequently Asked Questions
How to fix poor drainage around a house?
Start by checking your garden slope: it should fall away from the house at roughly 1:50 to 1:80. Clear gutters and extend downspouts at least 1.5 metres from the walls. If surface water still pools, install a French drain or a rain garden to capture and infiltrate runoff. For persistent problems or water near the foundations, commission a residential flood risk assessment to identify the root cause before spending money on fixes.
What are the benefits of installing Sustainable Drainage Systems (SuDS) at home?
Sustainable drainage systems (SuDS) for homes manage surface water at source, reducing pressure on public sewers and lowering flood risk. They improve water quality by filtering pollutants through soil and plants, support biodiversity, and often satisfy local planning conditions. Many councils now expect SuDS features in new builds and extensions, so including them early can speed up planning approval and avoid costly redesigns later.
What are the most common causes of residential drainage failure?
The usual culprits are blocked or broken gutters, downspouts discharging too close to the foundations, incorrect garden grading that sends water toward the house, and soil compaction that stops water infiltrating. Tree roots invading pipework and aging drainage pipes also cause failures. A residential flood risk assessment will pinpoint which of these applies to your property and recommend the most cost-effective repair.
How do I ensure my drainage system complies with local planning requirements?
Check with your local planning authority and Lead Local Flood Authority early in the design process. They will confirm whether a residential flood risk assessment or SuDS scheme is required. Following the SuDS hierarchy (preferring infiltration, then attenuation, then discharge to watercourse or sewer) and submitting detailed drainage designs with your application reduces the chance of rejection. Professional drainage design support can help you meet these requirements first time.